
Once they finish flowering, daylilies can be divided. Divide them into 6 to 8-inch clumps and transplant them two feet apart. For larger areas, daylilies can be divided into individual fan divisions. Each division should have a single fan with leaves and a group of roots. The new divisions need to be placed six to twelve inches apart.
Diving daylilies
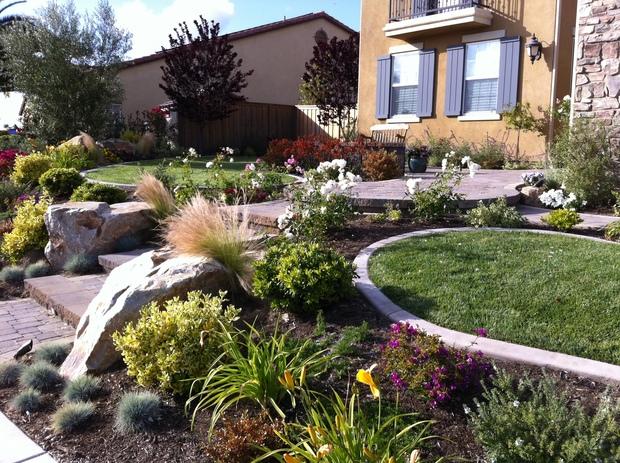
Diving daylilies can be a stunning addition to a flower bed. These plants grow in clumps and should be divided every few years to maintain the plant's health and blooms. Splitting clumps is necessary because they can become too wide, crowding out the stems and roots at the center of the mound. Dividing clumps can encourage plants to grow and flower more abundantly.
This plant grows well in a variety of conditions, including drought. Although the plant is drought-resistant, it should still be maintained in good condition during dry spells. You can easily find ready-to-plant Hemerocallis in one- or two-gallon pots at your local garden center. After purchasing your plant, you will need to loosen the soil about 18 inches deep and prepare the area for planting.
Daylilies grow quickly so be sure to divide clumps when necessary. Early spring or late summer is the best time to split clumps. The roots should be divided into clumps with three or more fans. Transplant the roots in another part of the garden.
Before planting, make sure to remove any wilted buds or old flowers. Also, you should remove any scapes or leaves that are not in use. Apply a slow-release fertilizer with low nitrogen content after the blooming period. After fertilizing your plant, make sure to water it well.
Replanting daylilies
First, dig a hole approximately twice the size of the daylily's rootball. This hole should be filled with compost or garden soil. The crown should be planted in the hole. To make a good start, water thoroughly.
Before replanting your daylily after division, examine the core for dead growth and to determine whether the plant is overgrown. If you find that the plant is too large, take out the leaf ends. After that, divide the plant into two or more clusters. Each cluster should include at least three stems as well as several roots. Remove any roots that are damaged or diseased.
After you have replanted daylilies, make sure to feed them with a balanced fertiliser. Also, remove any weeds. These weeds are a threat to daylilies' ability to receive sunlight and nutrients and can also harbor pests. After the plant is healed, it will begin to grow new scapes or flower buds.
Dig a hole twice as large as your daylily's roots in order to divide it. The hole should be deep enough to fit the root ball and not too shallow. Then fill in the hole using a fertile and healthy soil. Mulch should be used to protect the new daylily plant.
Dividing daylilies
Dividing daylilies can be a fun way to share daylilies among friends. Daylilies, which are perennials, can be divided as many as you like. They can also last for up to five years. You can divide daylilies in pots and replant them in the ground. A daylily that has been divided is healthier and more likely to bloom the next season.
Daylilies work best when they are divided in the autumn or late summer. While you can still divide them early in spring, you might find that they bloom less beautifully in the fall. Divide them in the fall to allow them plenty of time for establishment before the bloom season.
Once the leaves have fallen, division of daylilies can be done in a very simple process. You just need to dig up the plant, remove the soil and divide it. Daylilies are incredibly hardy and difficult to kill. It is best to do this when the soil is just above it.
First, determine the size of the daylily that is big enough to be divided. You will get the best results if you choose a healthy and large daylily. Daylily overproduction and excessive growth are signs that the daylily should be separated.
Replanting daylilies after they finish blooming
A little planning is required to plant daylilies when they are done with blooming. First, dig a hole twice wide as the daylily’s roots. Next, fill the hole up with new, fertile soil. Once the division is planted, you can surround it with a quality mulch.
Daylily plants should be replanted after their blooms have ended. This is best done in the late summer or early autumn. Planting them in the early spring can make them less bloomy. They will be more productive if you divide them in fall, as they have already started to establish and bloom.
Daylilies grow indefinitely so it is worth dividing them every few seasons to ensure more blooms. The roots of Daylilies get overgrown after five to six years, so dividing them will help rejuvenate the plant and keep it looking great. Divide daylilies in small clumps of approximately 5-6 inches tall.
After daylilies have finished blooming, cut back the leaves to the base to encourage new blooms. The plant may not bloom the following year if it becomes too crowded. This can be fixed by dividing the plant and planting it in a new place. To divide it, use garden secateurs or bypass pruners. The roots of daylilies are extremely resilient, so you can use a garden fork to remove the dead leaves and flowers.
The blooming season of daylilies can be extended by replanting them after they have finished flowering. Daylilies are perennial plants that grow well in warm places. You don’t need to worry about soil or watering daylilies as much as you do with other flowers. Daylilies don't require much maintenance and can be grown in almost any garden. Daylilies are extremely hardy and only require very little water. As long as they get lots of sun and are in a sunny area, you can plant them anywhere.
Daylily digging
Digging up daylilies is a great way to give them more room and nutrients. First, loosen soil around the base and sides of daylily plants. Dig a small space beneath the roots using a shovel. Next, lift the plant off the soil. For larger plants, you might want to divide the plant. You should not cut the roots as they will grow back into new plants.
Daylilies are very easy to grow and maintain. You can also divide them and transplant them to other locations. Dig a hole twice your daylily's root mass in order to transplant them. Spread the roots on a layer of soil. Add some organic matter or slow-release fertilizer. To acclimate the plants to new soil, water them.
To divide daylilies, you should do this early in Spring when the plant is not full. You should dig the plant six to eight inches deep. Your daylilies will appreciate a little more moisture. Use gloves to protect your hands.

If the daylily plant has grown fast, you may have to remove it. Daylilies are considered weeds in certain areas. They can take over large areas within a few months. They can also be an invasive plant that can cause damage to other plants.
Transplanting daylilies
Daylilies, which are perennials can be divided once every three years to increase flowering. It is essential to dig a large hole to allow for the planting of each new division. After that, place the roots of each new section six to twelve inches apart. You want your plants to thrive.
Following these simple steps is all it takes to plant daylilies. First, get rid of any fallen leaves. In late winter, daylily foliage starts to die back, pulling away from the plant. To remove the dead leaves, cut back the foliage with a hedge shear. The old leaves provide a home for insects and diseases.
Daylilies are simple to transplant and split. Their roots are resilient and can withstand the shock of transplant. They need to be moved in a well-lit place. Before transplanting, make sure they have enough sunlight and water. Once transplanted, the daylilies should begin to perk up in their new location.
Dig a hole big enough to support the daylily roots before you begin transplanting. The soil should be about one foot deep. On top, the crown of the daylily must be planted. Mulch can be used in place of fertilizer.
FAQ
What's the best way to keep my indoor plant alive?
Indoor plants can survive for several years. To promote new growth, it is essential to repot your indoor plants every few month. Repotting is easy; simply remove the old soil and add fresh compost.
How can you prepare the soil to grow vegetables in your garden?
It's easy to prepare the soil for a vegetable gardening. The first step is to remove any weeds that may be in the area where your vegetable garden will be planted. Add organic matter such as leaves, composted manure or grass clippings, straw, wood chips, and then water. Let the plants grow by watering well.
What equipment do I need to grow vegetables?
No, not really. All you need to do is use a shovel, trowels, watering containers, and maybe even a rake.
What is the most important thing to do before you start a new garden?
The first step to starting a garden is to prepare it. This includes adding organic matter such as composted manure, grass clippings, leaves, straw, etc., which helps provide plant nutrients. Next, you will plant your seeds or seedlings directly into the prepared holes. Then, water well.
What's the difference?
Hydroponic gardening uses nutrient-rich water instead of soil to feed plants. Aquaponics is a system that combines fish tanks and plants to create an ecosystem that is self-sufficient. Aquaponics is like having your own farm in your home.
How often should I water my indoor plant?
Indoor plants need watering every two days. Watering helps maintain humidity levels inside the house. Humidity is crucial for healthy plants.
Can I grow vegetables in my backyard?
It's possible to wonder if you will have enough space for a vegetable or fruit garden if your current one is not available. The answer is yes. A vegetable garden doesn't take up much space at all. It takes just a little planning. Raised beds can be built as low as 6 inches. You can also use containers as raised beds. You'll still be able to get plenty of produce in any way.
Statistics
- Most tomatoes and peppers will take 6-8 weeks to reach transplant size so plan according to your climate! - ufseeds.com
- As the price of fruit and vegetables is expected to rise by 8% after Brexit, the idea of growing your own is now better than ever. (countryliving.com)
- According to a survey from the National Gardening Association, upward of 18 million novice gardeners have picked up a shovel since 2020. (wsj.com)
- Today, 80 percent of all corn grown in North America is from GMO seed that is planted and sprayed with Roundup. - parkseed.com
External Links
How To
Organic fertilizers to be used in the garden
Organic fertilizers include manure (compost), fish emulsions, seaweed extracts, blood meal, and compost. Organic fertilizers are made from non-synthetic materials. Synthetic fertilizers include chemicals used in industrial processes. They are widely used in agriculture because they provide nutrients to plants quickly and efficiently without requiring laborious preparation methods. However, synthetic fertilizers present risks to both the environment- and human health. To produce, synthetic fertilizers require a lot of energy and water. Many synthetic fertilizers are also harmful to groundwater and water surface because of runoff. This pollution is detrimental to humans and wildlife alike.
There are several types of organic fertilizers:
* Manure is a product of livestock eating nitrogen-rich food (a plant nutrient). It's made of bacteria and enzymes which break down the waste to simple compounds that can be taken by plants.
* Compost: A mixture of animal manure, grass clippings (decomposing leaves), vegetable scraps (vegetable scraps) and grass clippings (grass clippings). It is rich with nitrogen, phosphorus. potassium, calcium. magnesium. sulfur. iron. copper. manganese. molybdenum. chlorine. and carbon. It's porous so it is able to retain moisture well, and slowly releases nutrients.
* Fish Emulsion – A liquid product derived from fish oils. It is similar to soap in its ability to dissolve oils and fats. It has trace elements such as phosphorous, nitrogen and nitrate.
* Seaweed Oil - A concentrated mixture of minerals taken from kelp, red and brown algae, as well as green algae. It is a good source of vitamins A, C, iron, and iodine.
* Guano - excrement from seabirds, bats, reptiles, and amphibians. It contains nitrogen, sulfur, chloride and carbon.
* Blood Meal, the remains from slaughtered animals. It is high in protein, making it suitable for feeding poultry and other livestock. It also has trace minerals such as phosphorous, potassium, nitrogen and other nutrients.
Make organic fertilizer by combining equal parts manure, fish emulsion, and compost. Mix thoroughly. If you don’t own all three ingredients, one can be substituted for the other. For example, if you only have access to the fish emulsion, you can mix 1 part of fish emulsion with two parts of compost.
To apply the fertilizer, spread it evenly over the soil using a shovel or tiller. About a quarter of a cup of the fertilizer is needed per square foot. To see signs of new growth, you'll need more fertilizer each two weeks.